bernette 44 FUNLOCK
Item No. 5240005106
595.00 CHF
Availability in online store:
  • In Stock

bernette 44 FUNLOCK
Item No. 5240005106
bernette 44 FUNLOCK image number

Product Description


Description

Your compact overlocker for clean finish seams that takes your projects from woven to stretch fabrics straight to the finish line with ease.

Features

  • 2-, 3- and 4-thread overlock stitches
  • Overlock seam width 3–7 mm
  • Rolled hem width: 1,5 mm
  • LED light for optimal visibility
  • High stitch quality with speeds of up to 1300 stitches per minute
null

Beautiful overlock seams, even for beginners


The bernette 44 FUNLOCK is easy to operate, even for beginners, because the 15 different stitches with 2, 3, or 4 threads ensure maximum flexibility when selecting stitches. And, at the same time, you always achieve a professional stitch quality. In addition to the 2, 3 and 4-thread seams, you can also provide your sewing projects with excellent rolled hems with a width of up to 1.5 mm.

null

Threading made simple


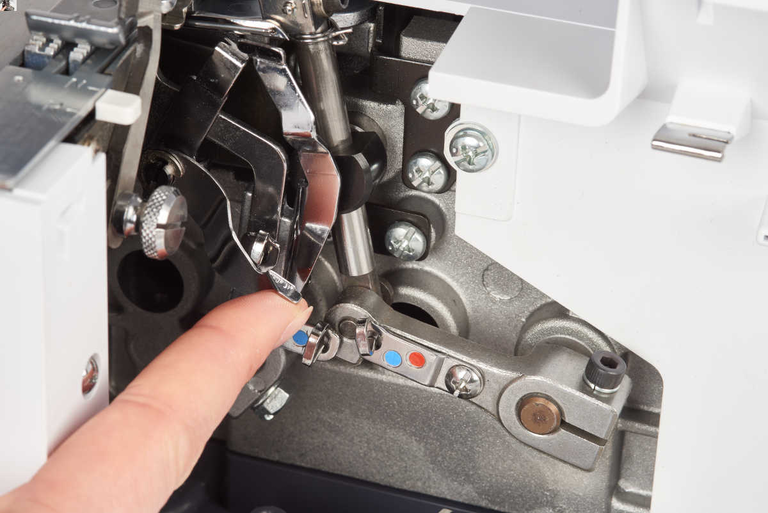
The color-coded, open thread path makes the bernette 44 FUNLOCK easy to thread by following the colored markings. A separate needle threader and lower looper threading mechanism also make threading easier.

null

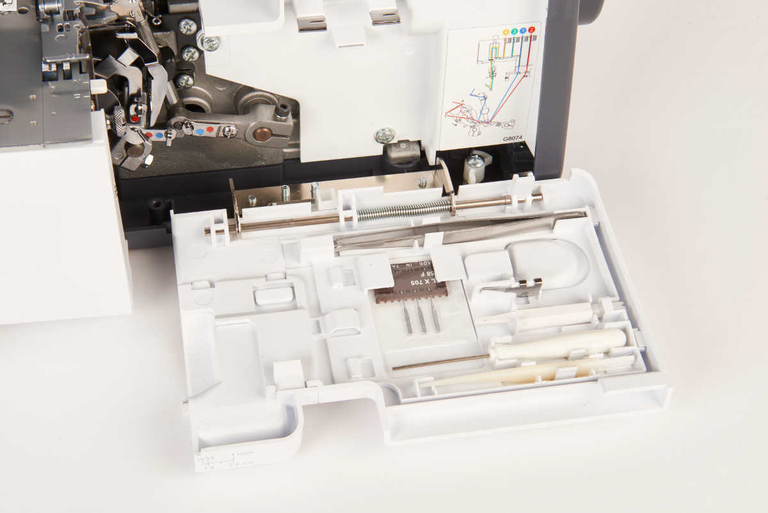
Plenty of space for your accessories


The most important overlocker accessories are always at hand in the looper cover. Other accessories are stored in a separate box.

null

Precise and flexible overlocking


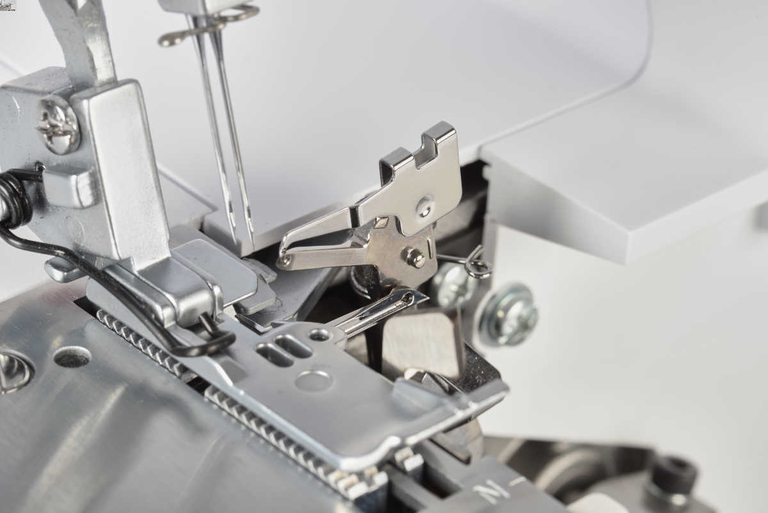
With the bernette 44 FUNLOCK, your sewing is always uniform, even at 1,300 stitches per minute. The overlocker even sews and cuts thicker fabric with ease and precision, in a single step. The seam allowances cut off during sewing drop into the waste collector that comes with the bernette 44 FUNLOCK.

null

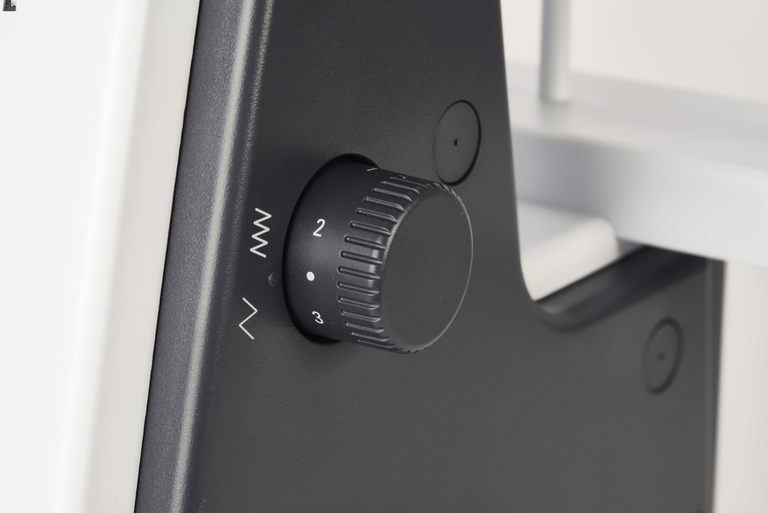
What is the differential feed for?


The differential feed always ensures smooth seams with knitted fabrics and crimp-free seams with fine fabrics. By adjusting the setting between 0.6 and 2, however, deliberate crimping can also be created, as for decorative ruffles.


Features and Functions

Electronic Foot Control
Measurements of the machine L / W / H [mm]
336 263 294
Weight of the machine [kg]
7,200 g
Freearm length to the right of the needle [inch / mm]
87 mm
Workspace height [inch / mm]
60 mm
Spool holder [number]
4
Main motor, Type
AC
Machine Type
mechanical
Sewing speed maximum [spm]
1,300 spm
Dust brush
Needle assortment
Net for upper thread spools
Dust cover machine
Accessory box

Tutorials

b48 + b44 + b42 Tutorial – Preparation (1/15)
Further information is available at http://www.mybernette.com Do you want to start using your b48, b44 or b42 for the first time? In our video tutorial, we show you the first steps. How do you attach and align the thread stand and the thread guide holder correctly? How do you connect the mains cable and the foot control, and where is the looper cover, as well as the accessories stored inside it? This basic information will help you get to know your overlocker and prepare for your first sewing project!
b48 + b44 + b42 Tutorial – Preparation (1/15)
b48 + b44 + b42 Tutorial – Rethreading (2/15)
Further information is available at http://www.mybernette.com In this video tutorial for your b48, b44 or b42, you will learn important basic information about rethreading, such as: when do you use the spool stabilizers? How can you tie directly onto threads for easy rethreading? How do you separate the thread chain, how do you pull the needle threads through first and then the separate looper threads?
b48 + b44 + b42 Tutorial – Rethreading (2/15)
b48 + b44 Tutorial – Overlock threading (3/15)
b48 + b44 Tutorial – Thread tension and overlock stitch optimization (5/15)
Further information is available at http://www.mybernette.com The appearance of the overlock stitches on your b48 or b44 is influenced by the type of fabric, the thread, the needles, stitch length and differential feed. To allow the threads to interlock loosely, first loosen one thread tension before you tighten another. In this video tutorial, we show you how to control and optimize the thread tension for the various types of overlock stitches. We show you what details you should consider for the following stitches: 4- and 3-thread overlock and 3-thread narrow seams, 3-thread roll hems, and 3-thread flatlock stitches.
b48 + b44 Tutorial – Thread tension and overlock stitch optimization (5/15)
b48 + b44 + b42 Tutorial – Stitch length and differential feed (7/15)
b48 + b44 Tutorial – Stitch width, cutting width, rolled hem (8/15)
b48 + b44 Tutorial – Upper looper converter (9/15)
b48 + b44 Tutorial – Basic overlock settings and sewing test (4/15)
Further information is available at http://www.mybernette.com With the help of this video, you can try out your first overlock stitch sewing test on your bernette 48 or bernette 44. What basic settings do you need to sew your first stitches? What do the thread tension, stitch length and differential feed do? How do you set the knife to the correct position, and how do you use the roll hem lever and presser foot pressure? When you have laid all the threads from the looper eye and the needle eye under the presser foot, lower the foot and you can slowly start to sew. The excess seam allowance is automatically cut off during the process.
b48 + b44 Tutorial – Basic overlock settings and sewing test (4/15)
b48 + b44 + b42 Tutorial – Changing the needles and needle threader (6/15)
Further information is available at http://www.mybernette.com This video tutorial shows you how to change the needles on your b48, b44 or b42, and how to use the needle threader. When you open the looper cover, you will find a needle holder and an appropriate screwdriver. To change a needle, first loosen the needle screw slightly. When you then wiggle the needle slightly, it will come out. Now insert the new needle into the needle clamp and push it all the way up into the correct position. You can then tighten the needle screw again. The video continues showing the use of the needle threader, which you orient with the notch up. You can then insert the thread horizontally and guide it along the needle groove with little pressure until the thread is guided through the needle eye. Now you can pull the thread through the eye of the needle with ease.
b48 + b44 + b42 Tutorial – Changing the needles and needle threader (6/15)
b48 + b44 + b42 Tutorial – Maintenance (15/15)
Further information is available at http://www.mybernette.com It is important to take a little time to regularly clean and maintain your b48, b44 or b42, because during sewing and cutting, fabric, thread and, of course, dust residues build up. In this video tutorial, we show you how to care for your bernette properly. When you open the looper cover, you will find a brush. In the accessory box you will also find a screwdriver and the overlock machine oil. The video shows you exactly how to remove the presser foot and the stitch plate to clean your machine in this area. We then show you which parts you can oil and what to do to make sure the oil is well distributed.
b48 + b44 + b42 Tutorial – Maintenance (15/15)