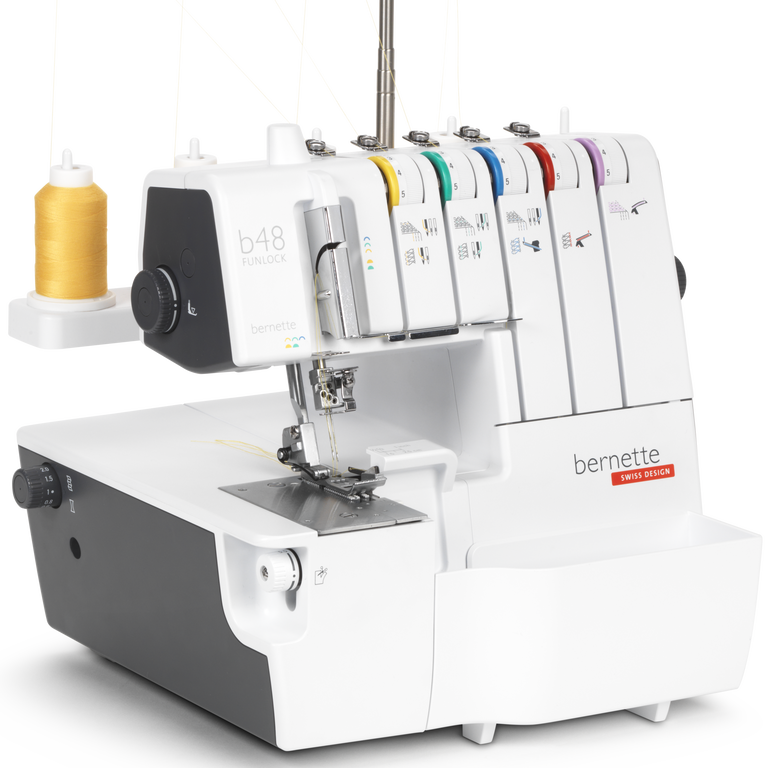
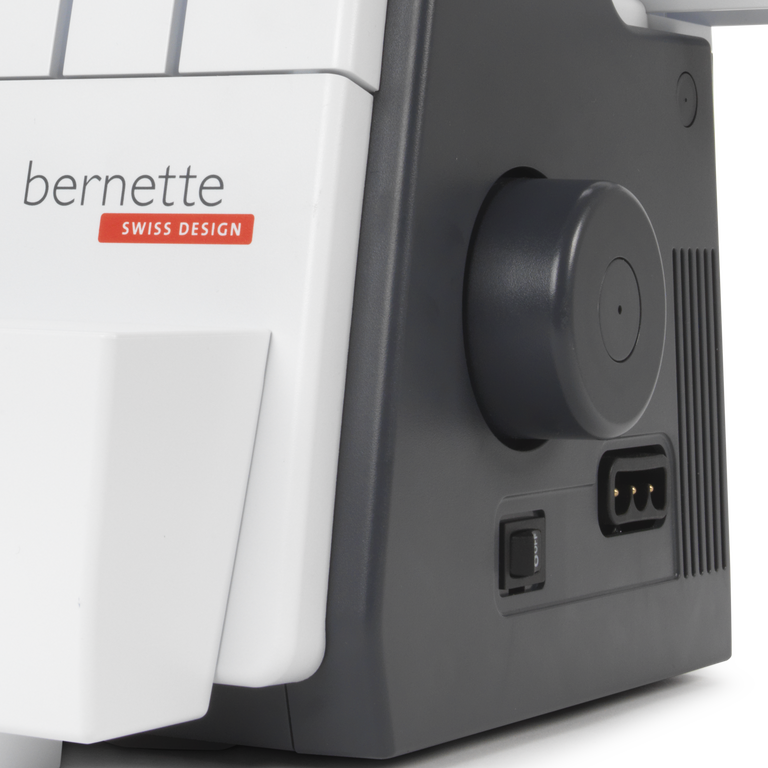
bernette 48 FUNLOCK

bernette 48 FUNLOCK
Article n° : 5240007106
895.00 CHF
Disponibilité en ligne:
  • Disponible

bernette 48 FUNLOCK
Article n° : 5240007106
bernette 48 FUNLOCK image number

Description du produit


Description

Ta machine combinée compacte, qui coud, coupe et surfile en un seul geste, pour des coutures qui déchirent.

Attributs

  • Coutures à 2, 3, 4 et 5 fils
  • Points de surjet larges : de 3 à 7 mm
  • Points enveloppants larges : 2,8 / 5,6 mm
  • Larges points combinés : jusqu'à 10 mm
  • Points pour ourlet roulé larges : 1,5 mm
null

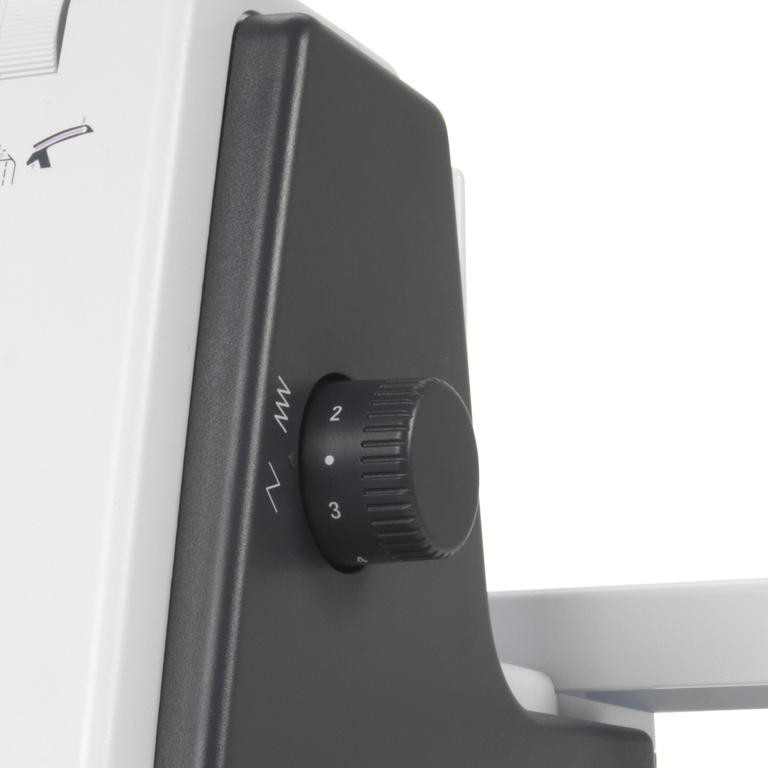
Une vaste gamme de points pour des coutures d'une grande qualité


Ta bernette 48 FUNLOCK dispose d'une vaste gamme de points : que tu souhaites piquer des coutures sécurisées ou des bordures avec le point de surjet, le point enveloppant ou un point super stretch adapté aux tissus très extensibles, des coutures plates, des coutures roulées ou des points de chaînette... les possibilités offertes par ta bernette 48 FUNLOCK sont quasiment infinies.

null

L'enfilage devient un jeu d'enfant


Si tu suis les schémas colorés de ta bernette 48 FUNLOCK, l'enfilage s'avère très intuitif. Un enfile-aiguille séparé et un mécanisme d'enfilage du boucleur inférieur facilitent grandement l'opération.

null

Une vaste surface de travail pour les grands ouvrages de couture


Avec sa surface de travail de 87 mm, la bernette 48 FUNLOCK offre suffisamment d'espace pour les ouvrages de couture les plus vastes. Un autre atout : l'éclairage LED lumineux garantit une grande luminosité sous l'aiguille.

null

Vitesse de couture élevée pour un fonctionnement efficace


Grâce à la bernette 48 FUNLOCK, il est possible de piquer des coutures droites à une vitesse impressionnante. Avec sa vitesse de 1 300 points par minute et sa grande précision, tu pourras réaliser ton ouvrage en un temps record.


Caractéristiques

pédale électronique
Dimensions de la machine L / l / H [mm]
360 300 290
Poids de la machine [kg]
7,800 g
Longueur du bras libre à droite de l’aiguille [pouces / mm]
87 mm
Hauteur de la zone de travail [inch / mm]
60 mm
Porte-bobine [nombre]
5
Moteur principal, Type
AC
Vitesse max. de couture [points/minute]
1,300 spm
Brosse à poussière
Assortiment d'aiguilles
Filet pour les bobines de fil supérieures
housse anti‑poussière pour la machine
Boîte d’accessoires

Tutorials

b48 + b44 + b42 Tutorial – Preparation (1/15)
Further information is available at http://www.mybernette.com Do you want to start using your b48, b44 or b42 for the first time? In our video tutorial, we show you the first steps. How do you attach and align the thread stand and the thread guide holder correctly? How do you connect the mains cable and the foot control, and where is the looper cover, as well as the accessories stored inside it? This basic information will help you get to know your overlocker and prepare for your first sewing project!
b48 + b44 + b42 Tutorial – Preparation (1/15)
b48 + b44 + b42 Tutorial – Rethreading (2/15)
Further information is available at http://www.mybernette.com In this video tutorial for your b48, b44 or b42, you will learn important basic information about rethreading, such as: when do you use the spool stabilizers? How can you tie directly onto threads for easy rethreading? How do you separate the thread chain, how do you pull the needle threads through first and then the separate looper threads?
b48 + b44 + b42 Tutorial – Rethreading (2/15)
b48 + b44 Tutorial – Overlock threading (3/15)
b48 + b42 Tutorial – Coverstitch/chainstitch (10/15)
b48 + b44 Tutorial – Thread tension and overlock stitch optimization (5/15)
Further information is available at http://www.mybernette.com The appearance of the overlock stitches on your b48 or b44 is influenced by the type of fabric, the thread, the needles, stitch length and differential feed. To allow the threads to interlock loosely, first loosen one thread tension before you tighten another. In this video tutorial, we show you how to control and optimize the thread tension for the various types of overlock stitches. We show you what details you should consider for the following stitches: 4- and 3-thread overlock and 3-thread narrow seams, 3-thread roll hems, and 3-thread flatlock stitches.
b48 + b44 Tutorial – Thread tension and overlock stitch optimization (5/15)
b48 + b44 + b42 Tutorial – Stitch length and differential feed (7/15)
b48 + b44 Tutorial – Stitch width, cutting width, rolled hem (8/15)
b48 + b44 Tutorial – Upper looper converter (9/15)
b48 + b44 Tutorial – Basic overlock settings and sewing test (4/15)
Further information is available at http://www.mybernette.com With the help of this video, you can try out your first overlock stitch sewing test on your bernette 48 or bernette 44. What basic settings do you need to sew your first stitches? What do the thread tension, stitch length and differential feed do? How do you set the knife to the correct position, and how do you use the roll hem lever and presser foot pressure? When you have laid all the threads from the looper eye and the needle eye under the presser foot, lower the foot and you can slowly start to sew. The excess seam allowance is automatically cut off during the process.
b48 + b44 Tutorial – Basic overlock settings and sewing test (4/15)
b48 + b44 + b42 Tutorial – Changing the needles and needle threader (6/15)
Further information is available at http://www.mybernette.com This video tutorial shows you how to change the needles on your b48, b44 or b42, and how to use the needle threader. When you open the looper cover, you will find a needle holder and an appropriate screwdriver. To change a needle, first loosen the needle screw slightly. When you then wiggle the needle slightly, it will come out. Now insert the new needle into the needle clamp and push it all the way up into the correct position. You can then tighten the needle screw again. The video continues showing the use of the needle threader, which you orient with the notch up. You can then insert the thread horizontally and guide it along the needle groove with little pressure until the thread is guided through the needle eye. Now you can pull the thread through the eye of the needle with ease.
b48 + b44 + b42 Tutorial – Changing the needles and needle threader (6/15)
b48 + b42 Tutorial – Coverstitch/chainstitch: basic settings and sewing test (11/15)
Further information is available at http://www.mybernette.com Would you like to carry out your first sewing test using coverstitch or chainstitch on your b48 or b42? Coverstitch is ideal for sewing hems, for example on elastic materials. In this video tutorial, we take you through the process, from the basic settings to sewing for the first time. First, we check the thread tensions, the stitch length setting, the differential feed setting and the presser foot pressure. Then we cut back the looper thread and make sure that the needle threads are not twisted. Now we start sewing, using the markings on the cover as guidelines. The first stitches are secured by the subsequent stitches, it is up to you to secure the last stitches manually.
b48 + b42 Tutorial – Coverstitch/chainstitch: basic settings and sewing test (11/15)
b48 + b42 Tutorial – Stitch optimisation for coverstitch and chainstitch (12/15)
b48 Tutorial – Converting from overlock to coverstitch/chainstitch (13/15)
b48 Tutorial – Basics of combo stitches (14/15)
b48 + b44 + b42 Tutorial – Maintenance (15/15)
Further information is available at http://www.mybernette.com It is important to take a little time to regularly clean and maintain your b48, b44 or b42, because during sewing and cutting, fabric, thread and, of course, dust residues build up. In this video tutorial, we show you how to care for your bernette properly. When you open the looper cover, you will find a brush. In the accessory box you will also find a screwdriver and the overlock machine oil. The video shows you exactly how to remove the presser foot and the stitch plate to clean your machine in this area. We then show you which parts you can oil and what to do to make sure the oil is well distributed.
b48 + b44 + b42 Tutorial – Maintenance (15/15)