bernette 44 FUNLOCK

bernette 44 FUNLOCK
Article n° : 5240005106
595.00 CHF
Disponibilité en ligne:
  • Disponible

bernette 44 FUNLOCK
Article n° : 5240005106
bernette 44 FUNLOCK image number

Description du produit


Description

Ta surjeteuse compacte pour des coutures nettes, qui mènent tes projets du tissé au stretch à la perfection.

Attributs

  • Points de surjet à 2, 3 et 4 fils
  • Largeur points de surjet: de 3 à 7 mm
  • Largeur points pour ourlet roulé : 1,5 mm
  • Éclairage LED clair
  • Vitesse de couture jusqu'à 1300 points/minute
null

Des coutures de surjet magnifiques, même pour les débutants


La bernette 44 FUNLOCK est simple d'utilisation, y compris pour les débutants. Exécutés avec 2, 3 ou 4 fils, les 15 points différents garantissent une flexibilité optimale. Tous ces atouts t'offrent une qualité de point professionnelle. En plus des coutures à 2, 3 ou 4 fils, tu pourras aussi coudre de magnifiques ourlets roulés d'une largeur pouvant atteindre jusqu'à 1,5 mm.

null

L'enfilage devient un jeu d'enfant


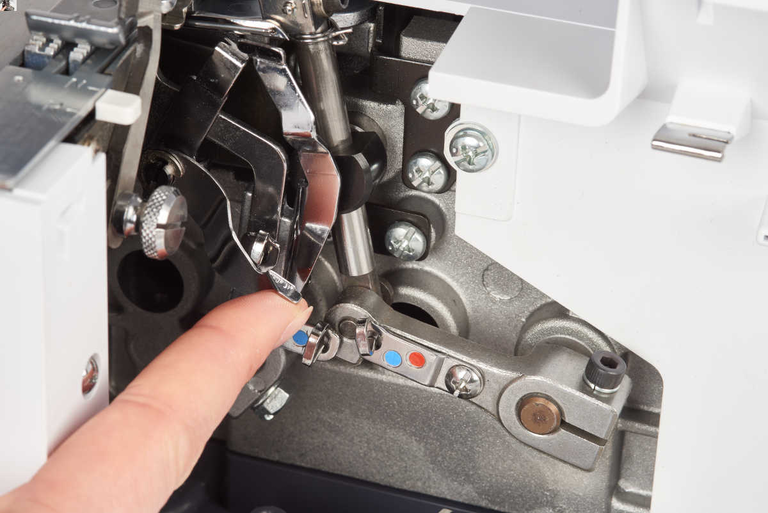
Les guides d'enfilage colorés et ouverts de la bernette 44 FUNLOCK simplifient l'enfilage grâce à des codes couleur . L'enfile-aiguille séparé et le mécanisme d'enfilage du boucleur inférieur simplifient également grandement la tâche.

null

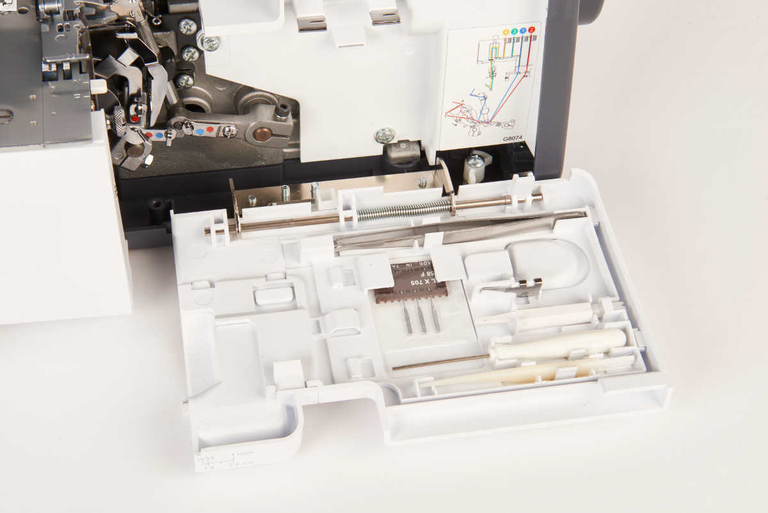
Un vaste espace pour vos accessoires


Les accessoires de surjet les plus importants sont toujours à portée de main dans le couvercle du boucleur. D'autres accessoires sont rangés dans une boîte séparée.

null

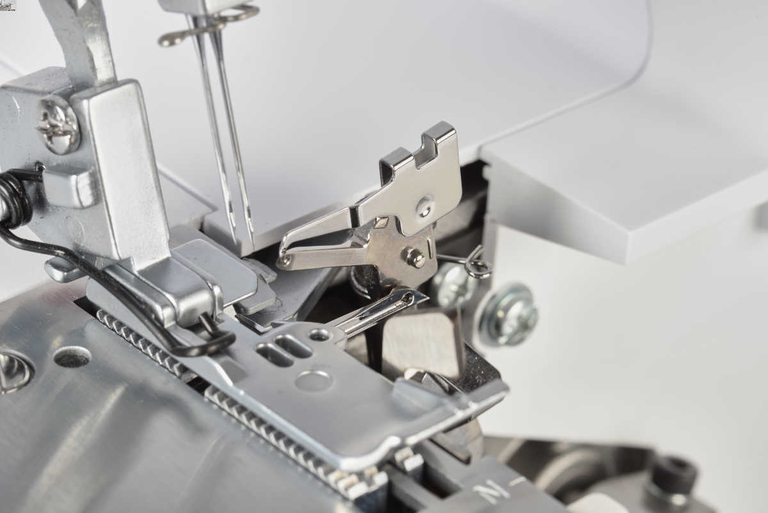
Un point de surjet précis et flexible


Avec la bernette 44 FUNLOCK, ta couture demeure toujours uniforme, même à 1 300 points par minute La surjeteuse coud et coupe des tissus plus épais en une seule étape avec facilité et précision. Les surplus de couture coupés pendant la couture tombent dans le récupérateur de chutes de tissu livré avec la bernette 44 FUNLOCK.

null

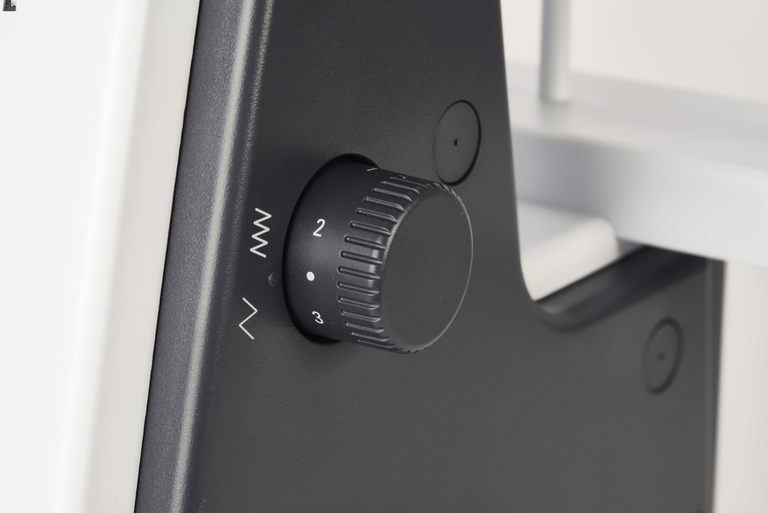
À quoi sert le transport différentiel


Le transport différentiel empêche les coutures de former des vagues dans les tissus tricotés et de faire onduler les tissus fins. En réglant la longueur de point entre 0,6 et 2 cependant, il est possible de réaliser volontairement des vagues , par ex. des fronces ornementales.


Caractéristiques

pédale électronique
Dimensions de la machine L / l / H [mm]
336 263 294
Poids de la machine [kg]
7,200 g
Longueur du bras libre à droite de l’aiguille [pouces / mm]
87 mm
Hauteur de la zone de travail [inch / mm]
60 mm
Porte-bobine [nombre]
4
Moteur principal, Type
AC
Type de machine
Mécanique
Vitesse max. de couture [points/minute]
1,300 spm
Brosse à poussière
Assortiment d'aiguilles
Filet pour les bobines de fil supérieures
housse anti‑poussière pour la machine
Boîte d’accessoires

Tutorials

b48 + b44 + b42 Tutorial – Preparation (1/15)
Further information is available at http://www.mybernette.com Do you want to start using your b48, b44 or b42 for the first time? In our video tutorial, we show you the first steps. How do you attach and align the thread stand and the thread guide holder correctly? How do you connect the mains cable and the foot control, and where is the looper cover, as well as the accessories stored inside it? This basic information will help you get to know your overlocker and prepare for your first sewing project!
b48 + b44 + b42 Tutorial – Preparation (1/15)
b48 + b44 + b42 Tutorial – Rethreading (2/15)
Further information is available at http://www.mybernette.com In this video tutorial for your b48, b44 or b42, you will learn important basic information about rethreading, such as: when do you use the spool stabilizers? How can you tie directly onto threads for easy rethreading? How do you separate the thread chain, how do you pull the needle threads through first and then the separate looper threads?
b48 + b44 + b42 Tutorial – Rethreading (2/15)
b48 + b44 Tutorial – Overlock threading (3/15)
b48 + b44 Tutorial – Thread tension and overlock stitch optimization (5/15)
Further information is available at http://www.mybernette.com The appearance of the overlock stitches on your b48 or b44 is influenced by the type of fabric, the thread, the needles, stitch length and differential feed. To allow the threads to interlock loosely, first loosen one thread tension before you tighten another. In this video tutorial, we show you how to control and optimize the thread tension for the various types of overlock stitches. We show you what details you should consider for the following stitches: 4- and 3-thread overlock and 3-thread narrow seams, 3-thread roll hems, and 3-thread flatlock stitches.
b48 + b44 Tutorial – Thread tension and overlock stitch optimization (5/15)
b48 + b44 + b42 Tutorial – Stitch length and differential feed (7/15)
b48 + b44 Tutorial – Stitch width, cutting width, rolled hem (8/15)
b48 + b44 Tutorial – Upper looper converter (9/15)
b48 + b44 Tutorial – Basic overlock settings and sewing test (4/15)
Further information is available at http://www.mybernette.com With the help of this video, you can try out your first overlock stitch sewing test on your bernette 48 or bernette 44. What basic settings do you need to sew your first stitches? What do the thread tension, stitch length and differential feed do? How do you set the knife to the correct position, and how do you use the roll hem lever and presser foot pressure? When you have laid all the threads from the looper eye and the needle eye under the presser foot, lower the foot and you can slowly start to sew. The excess seam allowance is automatically cut off during the process.
b48 + b44 Tutorial – Basic overlock settings and sewing test (4/15)
b48 + b44 + b42 Tutorial – Changing the needles and needle threader (6/15)
Further information is available at http://www.mybernette.com This video tutorial shows you how to change the needles on your b48, b44 or b42, and how to use the needle threader. When you open the looper cover, you will find a needle holder and an appropriate screwdriver. To change a needle, first loosen the needle screw slightly. When you then wiggle the needle slightly, it will come out. Now insert the new needle into the needle clamp and push it all the way up into the correct position. You can then tighten the needle screw again. The video continues showing the use of the needle threader, which you orient with the notch up. You can then insert the thread horizontally and guide it along the needle groove with little pressure until the thread is guided through the needle eye. Now you can pull the thread through the eye of the needle with ease.
b48 + b44 + b42 Tutorial – Changing the needles and needle threader (6/15)
b48 + b44 + b42 Tutorial – Maintenance (15/15)
Further information is available at http://www.mybernette.com It is important to take a little time to regularly clean and maintain your b48, b44 or b42, because during sewing and cutting, fabric, thread and, of course, dust residues build up. In this video tutorial, we show you how to care for your bernette properly. When you open the looper cover, you will find a brush. In the accessory box you will also find a screwdriver and the overlock machine oil. The video shows you exactly how to remove the presser foot and the stitch plate to clean your machine in this area. We then show you which parts you can oil and what to do to make sure the oil is well distributed.
b48 + b44 + b42 Tutorial – Maintenance (15/15)