bernette 42 FUNLOCK

bernette 42 FUNLOCK
Article n° : 5240003106
595.00 CHF
Disponibilité en ligne:
  • Disponible

bernette 42 FUNLOCK
Article n° : 5240003106
bernette 42 FUNLOCK image number

Description du produit


Description

Ta machine à point de recouvrement compacte – performante sur les tissus extensibles, faite pour des coutures qui attirent tous les regards.

Attributs

  • Machine pour point enveloppant avec 4 fils / 3 aiguilles
  • Vaste espace de travail à droite de l'aiguille……………………. 87 mm
  • Éclairage LED clair
  • Entraînement différentiel à l'extérieur, peut être réglé durant la couture
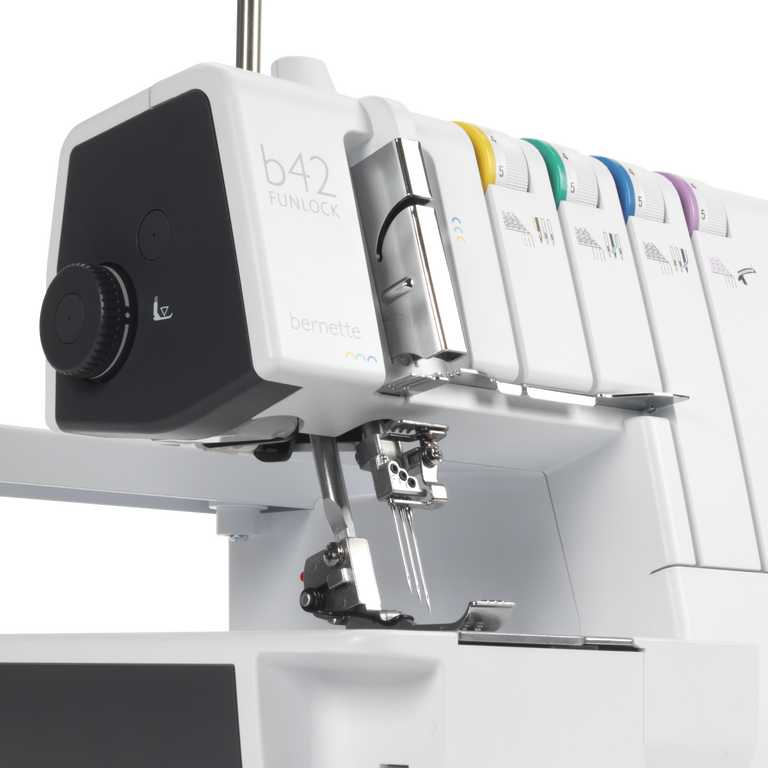
  • Enfilage facile grâce à des schémas d'enfilage colorés
null

Enfilage facile grâce à des guides d'enfilage colorés


L'enfilage est facilité par des guides d'enfilage colorés et par l'aide d'enfilage pour le boucleur inférieur. Il suffit de suivre les symboles colorés pour procéder à l'enfilage de ta bernette 42 FUNLOCK en un temps record.

null

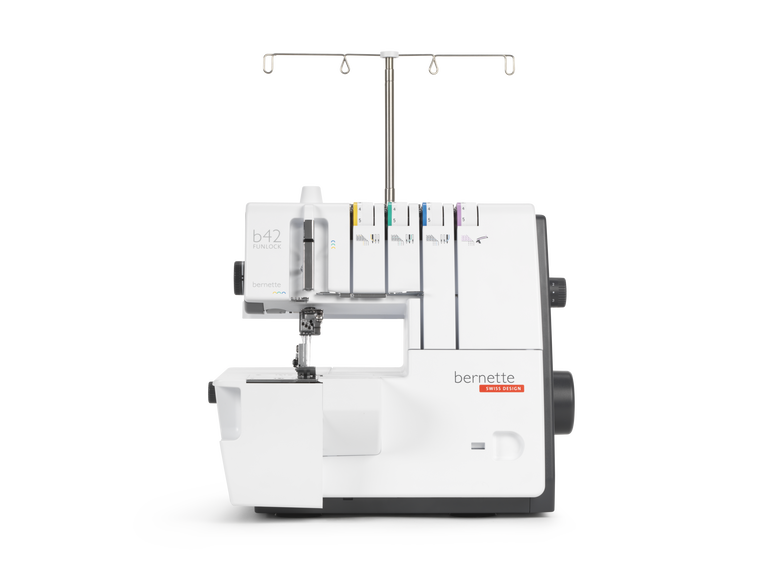
Une vaste surface de travail pour les grands ouvrages de couture


Avec un espace de 87 mm à droite de l'aiguille, la bernette 42 FUNLOCK offre aussi beaucoup d'espace pour les grands ouvrages de couture. Un autre atout : l'espace de travail est mis en lumière par un éclairage LED lumineux.

null

Vitesse de couture élevée pour un fonctionnement efficace


La vitesse de couture de la bernette 42 FUNLOCK peut être ajustée à l'aide du bouton de contrôle à un maximum de 1 300 points/minute. Quelle que soit la vitesse de couture, le point est toujours d'une grande précision.

null

Des fonctionnalités supplémentaires pour rendre la couture encore plus agréable


Tu peux ranger tous les accessoires les plus souvent utilisés dans le couvercle du boucleur de ta bernette 42 FUNLOCK. Ils seront ainsi toujours à portée de main.


Caractéristiques

pédale électronique
Dimensions de la machine L / l / H [mm]
336 263 294
Poids de la machine [kg]
680 g
Longueur du bras libre à droite de l’aiguille [pouces / mm]
87 mm
Hauteur de la zone de travail [inch / mm]
60 mm
Porte-bobine [nombre]
4
Moteur principal, Type
AC
Type de machine
Mécanique
Vitesse max. de couture [points/minute]
1,300 spm
Régler la tension du fil supérieur
manual
Brosse à poussière
Assortiment d'aiguilles
Filet pour les bobines de fil supérieures
housse anti‑poussière pour la machine
Boîte d’accessoires

Tutorials

b48 + b44 + b42 Tutorial – Preparation (1/15)
Further information is available at http://www.mybernette.com Do you want to start using your b48, b44 or b42 for the first time? In our video tutorial, we show you the first steps. How do you attach and align the thread stand and the thread guide holder correctly? How do you connect the mains cable and the foot control, and where is the looper cover, as well as the accessories stored inside it? This basic information will help you get to know your overlocker and prepare for your first sewing project!
b48 + b44 + b42 Tutorial – Preparation (1/15)
b48 + b44 + b42 Tutorial – Rethreading (2/15)
Further information is available at http://www.mybernette.com In this video tutorial for your b48, b44 or b42, you will learn important basic information about rethreading, such as: when do you use the spool stabilizers? How can you tie directly onto threads for easy rethreading? How do you separate the thread chain, how do you pull the needle threads through first and then the separate looper threads?
b48 + b44 + b42 Tutorial – Rethreading (2/15)
b48 + b42 Tutorial – Coverstitch/chainstitch (10/15)
b48 + b44 + b42 Tutorial – Changing the needles and needle threader (6/15)
Further information is available at http://www.mybernette.com This video tutorial shows you how to change the needles on your b48, b44 or b42, and how to use the needle threader. When you open the looper cover, you will find a needle holder and an appropriate screwdriver. To change a needle, first loosen the needle screw slightly. When you then wiggle the needle slightly, it will come out. Now insert the new needle into the needle clamp and push it all the way up into the correct position. You can then tighten the needle screw again. The video continues showing the use of the needle threader, which you orient with the notch up. You can then insert the thread horizontally and guide it along the needle groove with little pressure until the thread is guided through the needle eye. Now you can pull the thread through the eye of the needle with ease.
b48 + b44 + b42 Tutorial – Changing the needles and needle threader (6/15)
b48 + b44 + b42 Tutorial – Stitch length and differential feed (7/15)
Further information is available at http://www.mybernette.com In this tutorial video, we show you the various stitch length settings on your b48, b44 or b42. A stitch length of 2.5 to 3 is usually suitable for general sewing. For firm fabrics or thicker threads, you can set a longer stitch length and a shorter stitch length for rolled hems and other purposes. This video also shows you how to adjust the differential feed to the type of material in order to avoid seam puckering, for example. Or do you deliberately want to gather a fine fabric? The video shows you which settings to use for this.
b48 + b44 + b42 Tutorial – Stitch length and differential feed (7/15)
b48 + b42 Tutorial – Coverstitch/chainstitch: basic settings and sewing test (11/15)
Further information is available at http://www.mybernette.com Would you like to carry out your first sewing test using coverstitch or chainstitch on your b48 or b42? Coverstitch is ideal for sewing hems, for example on elastic materials. In this video tutorial, we take you through the process, from the basic settings to sewing for the first time. First, we check the thread tensions, the stitch length setting, the differential feed setting and the presser foot pressure. Then we cut back the looper thread and make sure that the needle threads are not twisted. Now we start sewing, using the markings on the cover as guidelines. The first stitches are secured by the subsequent stitches, it is up to you to secure the last stitches manually.
b48 + b42 Tutorial – Coverstitch/chainstitch: basic settings and sewing test (11/15)
b48 + b42 Tutorial – Stitch optimisation for coverstitch and chainstitch (12/15)
b48 + b44 + b42 Tutorial – Maintenance (15/15)
Further information is available at http://www.mybernette.com It is important to take a little time to regularly clean and maintain your b48, b44 or b42, because during sewing and cutting, fabric, thread and, of course, dust residues build up. In this video tutorial, we show you how to care for your bernette properly. When you open the looper cover, you will find a brush. In the accessory box you will also find a screwdriver and the overlock machine oil. The video shows you exactly how to remove the presser foot and the stitch plate to clean your machine in this area. We then show you which parts you can oil and what to do to make sure the oil is well distributed.
b48 + b44 + b42 Tutorial – Maintenance (15/15)